Deploy to Vercel
Copy page
Deploy the Inkeep Agent Framework to Vercel
Deploy to Vercel
Step 1: Create a GitHub repository for your project
If you do not have an Inkeep project already, follow these steps to create one. Then push your project to a repository on GitHub.
Step 2: Create a Postgres Database
Create a Postgres database on the Vercel Marketplace or directly at Neon.
Step 3: Create a Doltgres Database
Create a Doltgres database at DoltHub.
Step 4: Configure Database Connection
Set your database connection string as an environment variable:
Step 5: Create a Vercel account
Sign up for a Vercel account here.
Step 6: Create a Vercel project for Manage API
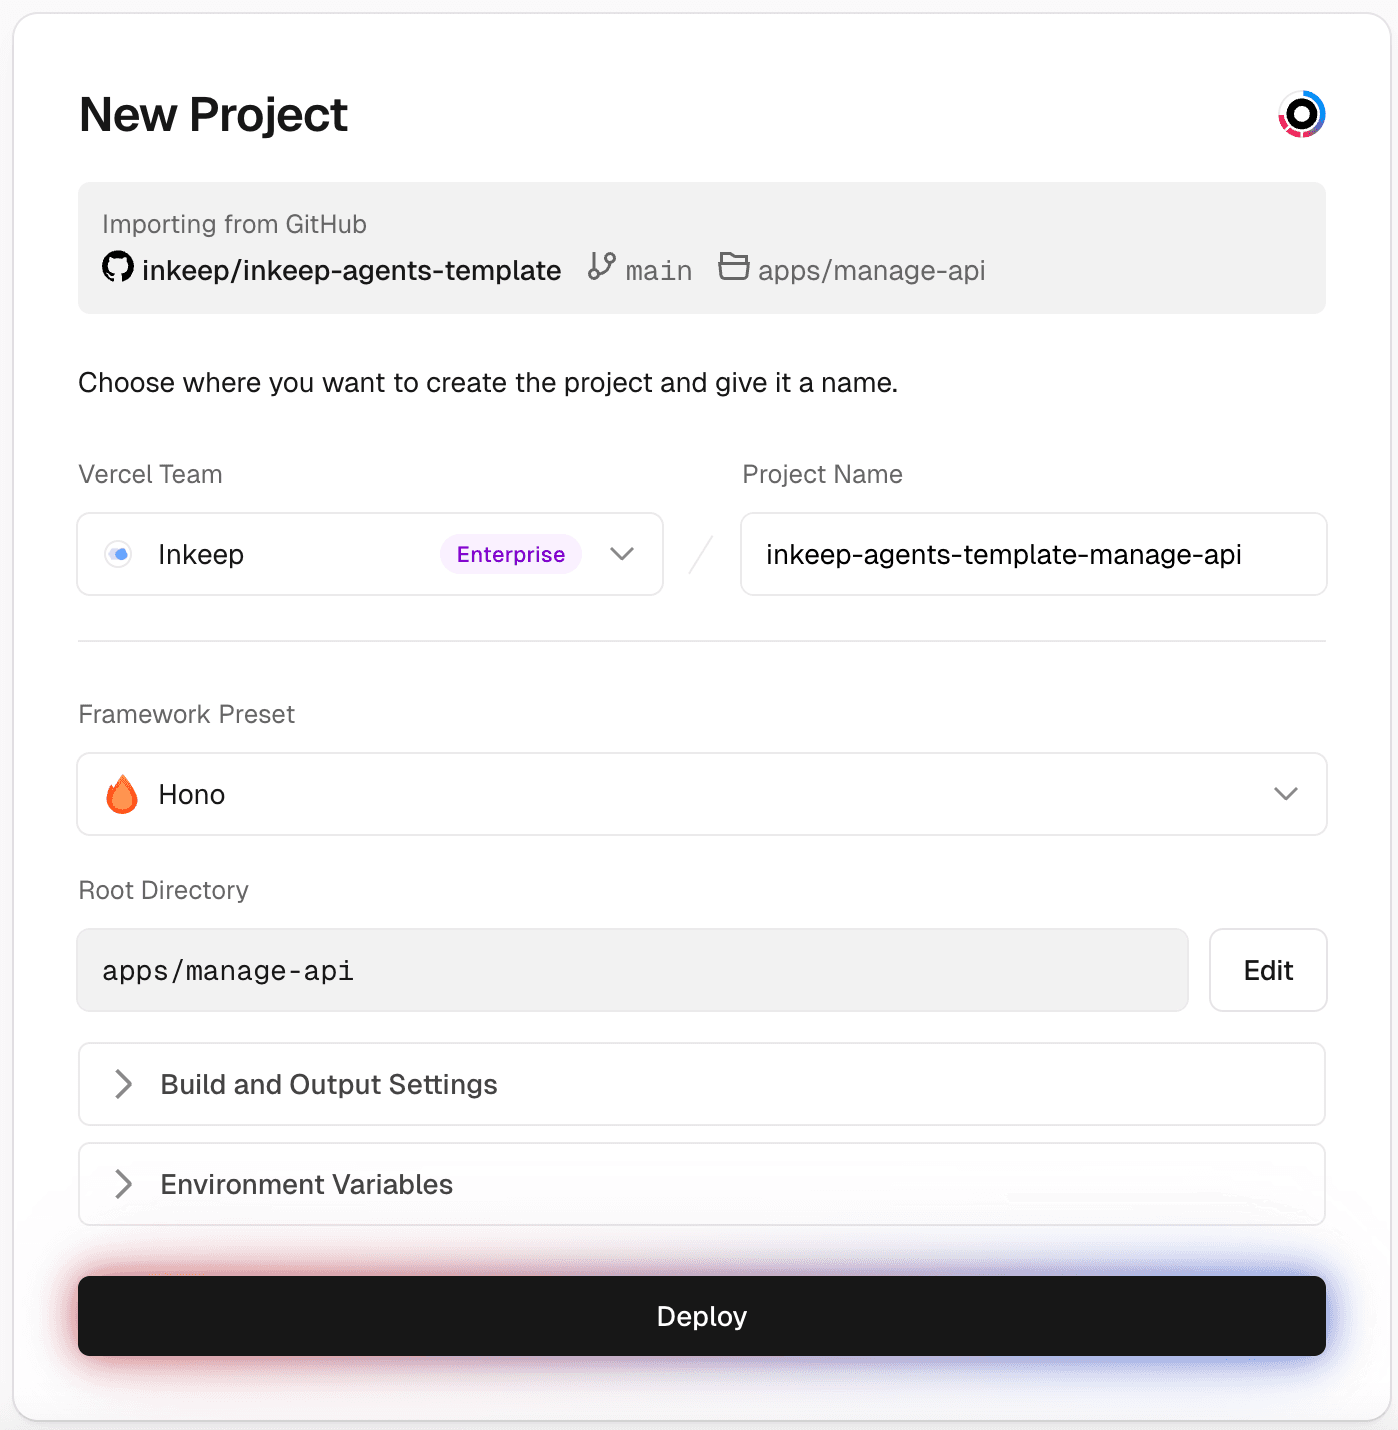
The Framework Preset should be "Hono" and the Root Directory should be
apps/manage-api.
Required environment variables for Manage API:
| Environment Variable | Value |
|---|---|
ENVIRONMENT | production |
INKEEP_AGENTS_MANAGE_API_BYPASS_SECRET | Run openssl rand -hex 32 in your terminal to generate this value. Save this value for INKEEP_AGENTS_MANAGE_API_BYPASS_SECRET in Step 7. |
INKEEP_AGENTS_MANAGE_DATABASE_URL | Doltgres connection string from Step 3 (e.g., postgresql://user:password@host:5432/database) |
INKEEP_AGENTS_RUN_DATABASE_URL | Postgres connection string from Step 4 (e.g., postgresql://user:password@host:5433/database) |
NANGO_SECRET_KEY | Nango secret key from your Nango Cloud account. Note: Local Nango setup won't work with Vercel deployments. |
NANGO_SERVER_URL | https://api.nango.dev |
Step 7: Create a Vercel project for Run API
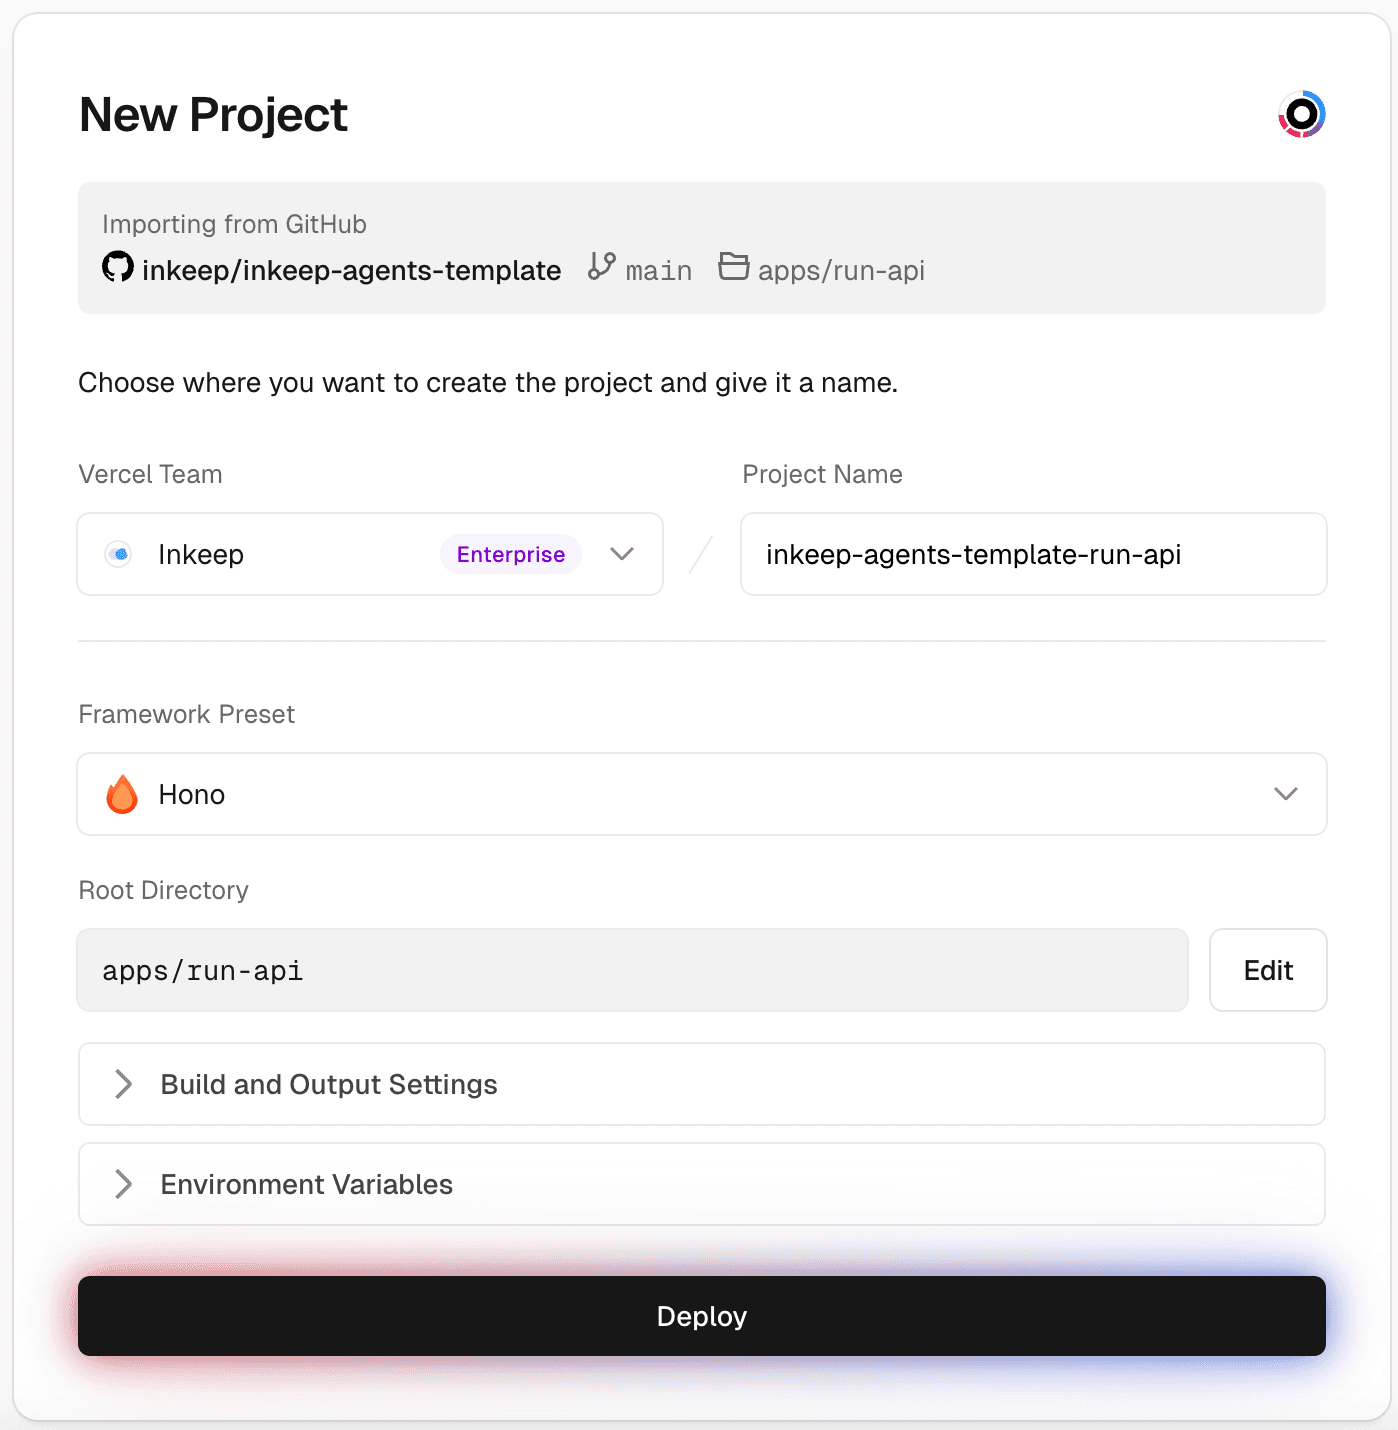
The Framework Preset should be "Hono" and the Root Directory should be
apps/run-api.
Required environment variables for Run API:
| Environment Variable | Value |
|---|---|
ENVIRONMENT | production |
ANTHROPIC_API_KEY | Your Anthropic API key |
OPENAI_API_KEY | Your OpenAI API key |
GOOGLE_GENERATIVE_AI_API_KEY | Your Google Gemini API key |
INKEEP_AGENTS_RUN_API_BYPASS_SECRET | Run openssl rand -hex 32 in your terminal to generate this value. Save this value for INKEEP_AGENTS_RUN_API_BYPASS_SECRET in Step 7. |
INKEEP_AGENTS_RUN_DATABASE_URL | Postgres connection string from Step 3 (e.g., postgresql://user:password@host:5432/database) |
NANGO_SECRET_KEY | Nango secret key from your Nango Cloud account. Note: Local Nango setup won't work with Vercel deployments. |
OTEL_EXPORTER_OTLP_TRACES_ENDPOINT | https://ingest.us.signoz.cloud:443/v1/traces |
OTEL_EXPORTER_OTLP_TRACES_HEADERS | signoz-ingestion-key=<your-ingestion-key>. Use the instructions from SigNoz Cloud Setup to configure your ingestion key. Note: Local SigNoz setup won't work with Vercel deployments. |
NANGO_SERVER_URL | https://api.nango.dev |
INKEEP_AGENTS_JWT_SIGNING_SECRET | Run openssl rand -hex 32 in your terminal to generate this value. Save this value for INKEEP_AGENTS_JWT_SIGNING_SECRET in Step 7. |
Step 8: Create a Vercel project for Manage UI
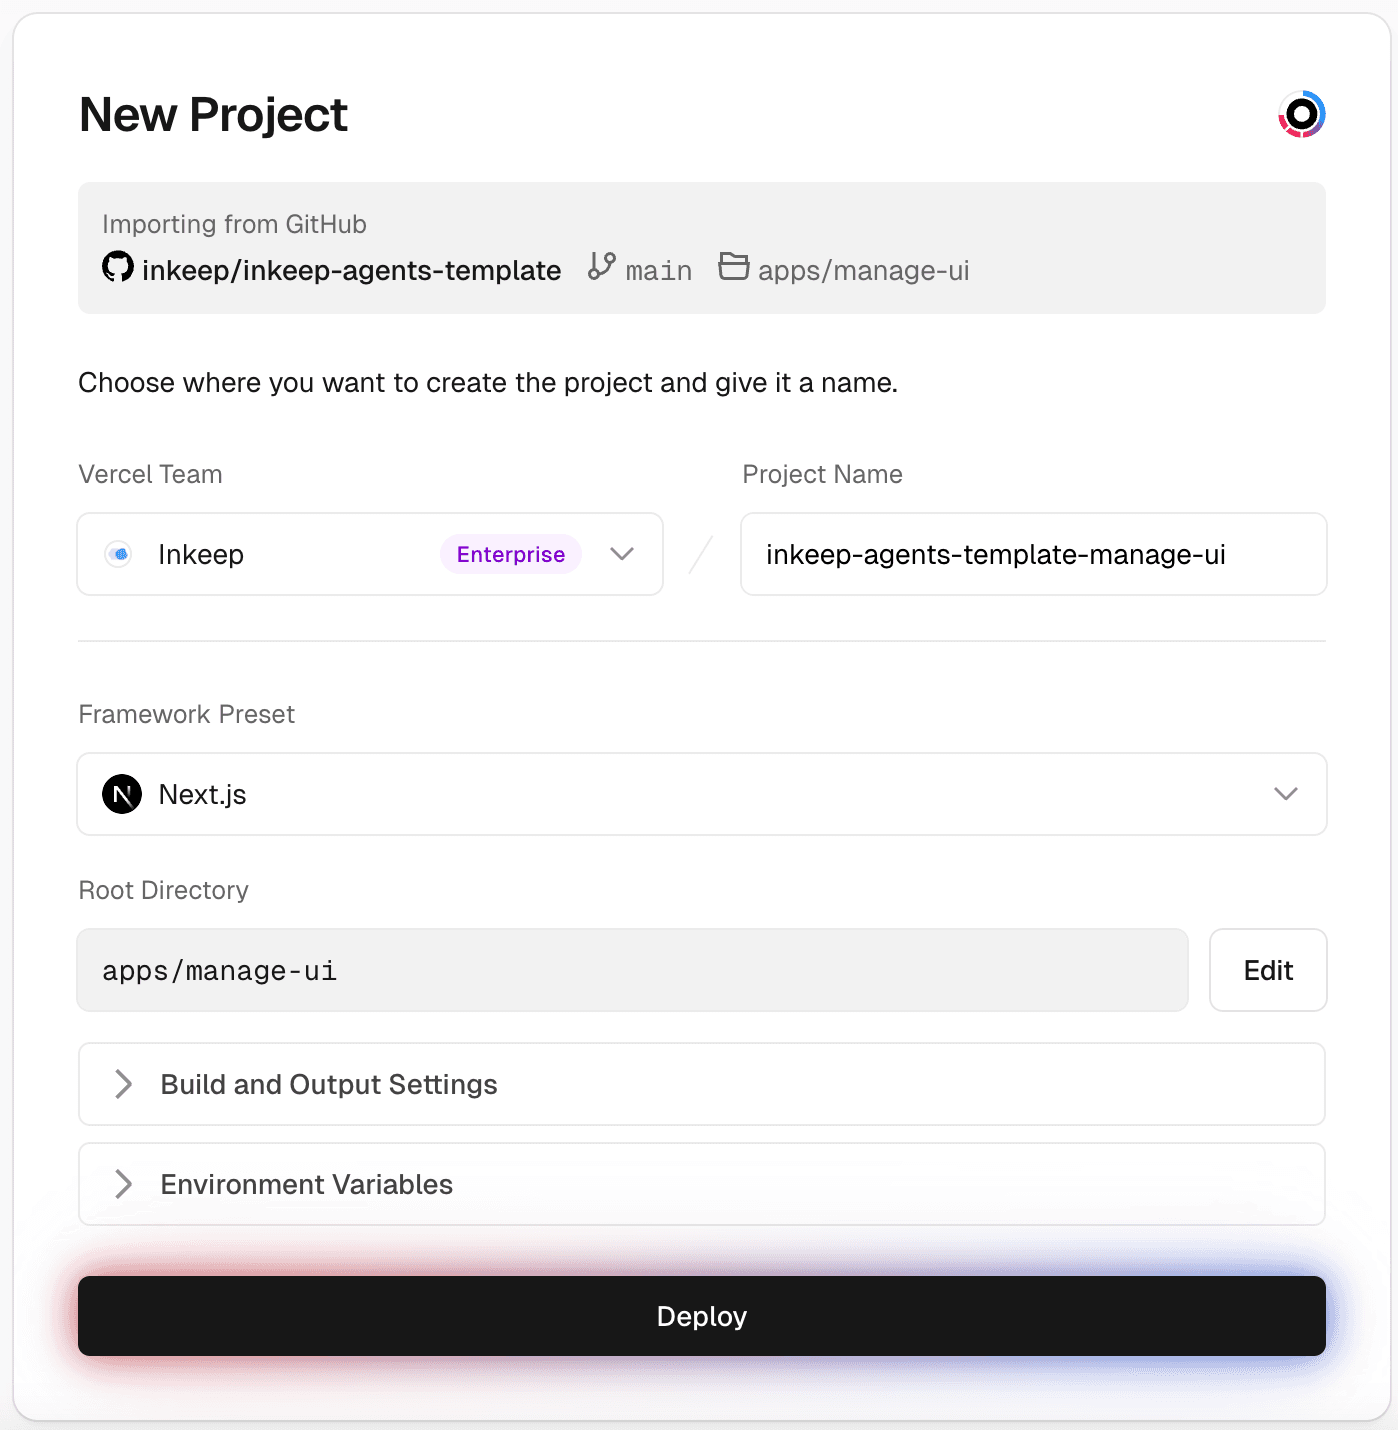
The Framework Preset should be "Next.js" and the Root Directory should be
apps/manage-ui.
Required environment variables for Manage UI:
| Environment Variable | Value |
|---|---|
ENVIRONMENT | production |
PUBLIC_INKEEP_AGENTS_RUN_API_URL | Your Vercel deployment URL for Run API |
PUBLIC_INKEEP_AGENTS_RUN_API_BYPASS_SECRET | Your generated Run API bypass secret from Step 6 |
PUBLIC_INKEEP_AGENTS_MANAGE_API_URL | Your Vercel deployment URL for Manage API (skip if same as INKEEP_AGENTS_MANAGE_API_URL) |
INKEEP_AGENTS_MANAGE_API_URL | Your Vercel deployment URL for Manage API |
INKEEP_AGENTS_MANAGE_API_BYPASS_SECRET | Your generated Manage API bypass secret from Step 5 |
PUBLIC_SIGNOZ_URL | Use the instructions from SigNoz Cloud Setup to configure your SigNoz URL. Note: Local SigNoz setup won't work with Vercel deployments. |
SIGNOZ_API_KEY | Use the instructions from SigNoz Cloud Setup to configure your SigNoz API key. Note: Local SigNoz setup won't work with Vercel deployments. |
NANGO_SECRET_KEY | Nango secret key from your Nango Cloud account. Note: Local Nango setup won't work with Vercel deployments. |
PUBLIC_NANGO_SERVER_URL | https://api.nango.dev |
PUBLIC_NANGO_CONNECT_BASE_URL | https://connect.nango.dev |
Step 9: Enable Vercel Authentication
To prevent anyone from being able to access the UI, we recommend enabling Vercel authentication for all deployments: Settings > Deployment Protection > Vercel Authentication > All Deployments.
Step 10: Create a Vercel project for your MCP server (optional)
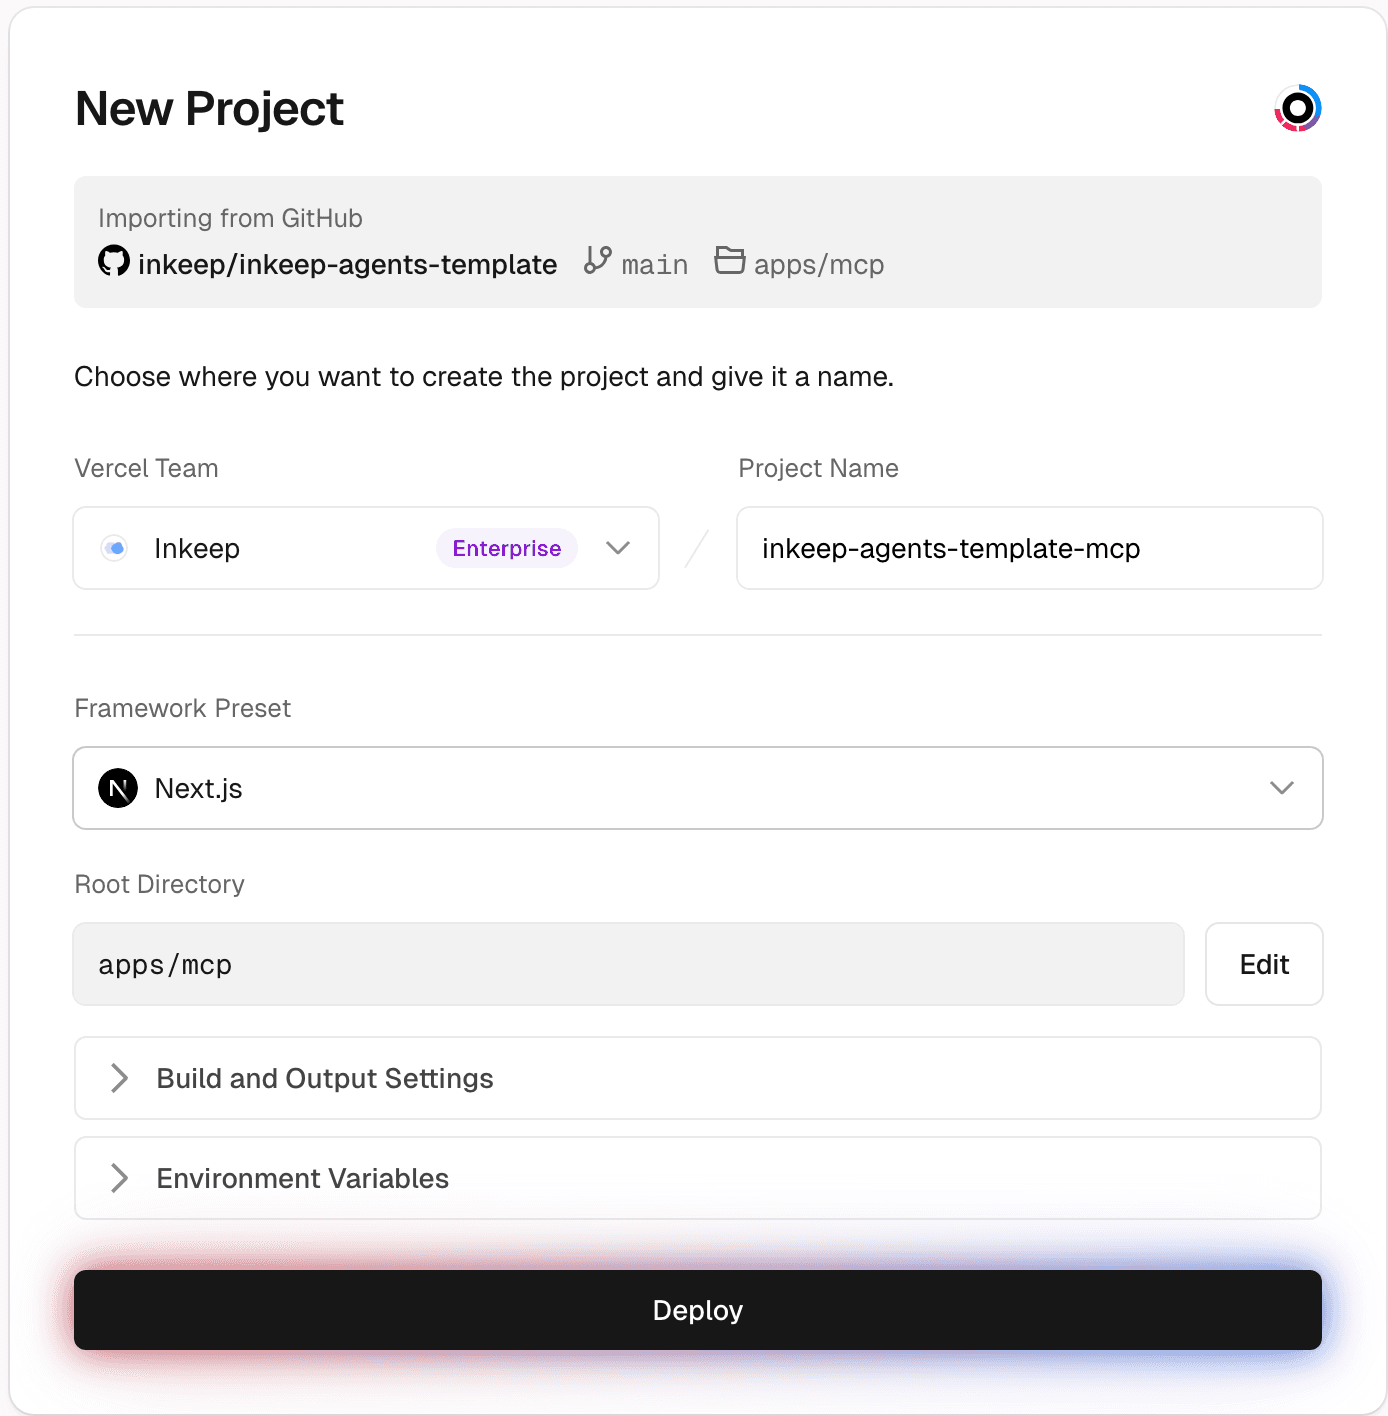
The Framework Preset should be "Next.js" and the Root Directory should be
apps/mcp.
For more information on how to add MCP servers to your project, see Create MCP Servers.
Push your Agent
Step 1: Configure your root .env file
Step 2: Create a cloud configuration file
Create a new configuration file named inkeep-cloud.config.ts in your project's src directory, alongside your existing configuration file.
Step 3: Push your Agent
Pull your Agent
Function Tools with Vercel Sandbox
When deploying to serverless environments like Vercel, you can configure function tools to execute in Vercel Sandbox MicroVMs instead of your Agent's runtime service. This is required for serverless platforms since child process spawning is restricted.
Why Use Vercel Sandbox?
When to use each provider:
- Native - Use for traditional cloud deployments (VMs, Docker, Kubernetes), self-hosted servers, or local development
- Vercel Sandbox - Required for serverless platforms (Vercel, AWS Lambda, etc.) or if you'd like to isolate tool executions
Setting Up Vercel Sandbox
Step 1: Get Vercel Credentials
You'll need three credentials from your Vercel account:
- Vercel Token - Create an access token at vercel.com/account/tokens
- Team ID - Find in your team settings at vercel.com/teams
- Project ID - Find in your Vercel project settings
Step 2: Configure Sandbox in Your Application
Update your Run API to use Vercel Sandbox.
In the apps/run-api/src folder, create a sandbox.ts file:
Import it into your index.ts file:
Step 3: Add Environment Variables to Run API
Add these environment variables in your Vercel project to your Run API app:
Deployment Protection
The Inkeep Agent Framework provides health endpoints for Kubernetes-style probes and optional integration with Vercel Checks for automated deployment protection.
Health Endpoints
Two health endpoints are available for monitoring deployment readiness:
/health - Liveness Probe
A lightweight endpoint that returns immediately to indicate the service is running.
- Response: HTTP 204 (No Content)
- Use case: Kubernetes liveness probes, load balancer health checks
- Latency: Sub-millisecond (no external calls)
/ready - Readiness Probe
A comprehensive endpoint that verifies database connectivity before serving traffic.
- Response (healthy): HTTP 200 with JSON status
- Response (unhealthy): HTTP 503 with RFC 7807 Problem Details
- Use case: Kubernetes readiness probes, deployment verification
Vercel Deployment Checks with GitHub Actions
Enable automated deployment protection using Vercel Deployment Checks combined with a GitHub Action. This approach blocks production deployments from being promoted until your health checks pass.
How It Works
- Deployment Created: Vercel creates a production deployment but doesn't promote it yet
- GitHub Action Runs: A workflow triggers when the deployment is ready and hits the
/readyendpoint - Status Reported: The GitHub Action reports success/failure back to GitHub
- Vercel Reads Status: Vercel reads the GitHub commit status and promotes the deployment only if checks pass
Step 1: Add the GitHub Action Workflow
The Inkeep Agent Framework includes a pre-configured workflow at .github/workflows/deployment-health-check.yml:
Step 2: Enable Deployment Checks in Vercel
- Ensure your project is connected to GitHub using Vercel for GitHub
- Go to Project Settings > Deployment Checks
- Click Add Checks and select the
health-checkjob from your GitHub Actions - Production deployments will now wait for the health check to pass before being promoted
Step 3: Test the Integration
- Push a change to your default branch
- Vercel creates a production deployment
- The GitHub Action runs and checks the
/readyendpoint - Once the check passes, Vercel promotes the deployment to your production domains
Staging and Production Deployment Strategy
This section explains how to configure Vercel for a staged deployment workflow where:
- Pushes to
maincreate staging (preview) deployments - GitHub releases trigger production deployments
This approach allows you to test changes on staging before promoting to production, with full control over production releases.
Deployment Flow Overview
Step 1: Disable Automatic Production Deployments
By default, Vercel deploys to production when you push to your production branch (usually main). To separate staging from production, disable automatic production deployments:
- Go to Project Settings > Git in the Vercel Dashboard
- Under Production Branch, change the value to
_disabled_ - Save your changes
Setting the Production Branch to _disabled_ is a special Vercel value that prevents any branch from automatically triggering production deployments. All pushes, including to main, will create preview deployments instead.
After this configuration:
- Pushes to
maincreate preview deployments atmain-<project>.vercel.app - Pushes to PR branches create preview deployments at
<branch>-<project>.vercel.app - No branch triggers automatic production deployments
Step 2: Configure GitHub Actions for Production Releases
The Inkeep Agent Framework includes a workflow that deploys to production when you publish a GitHub release. This integrates with the existing changesets release flow.
The workflow file is located at .github/workflows/vercel-production.yml:
Key features:
- Triggered by GitHub releases: Uses
release: types: [published]to deploy only when you explicitly publish a release - Uses the tagged commit: Checks out
github.event.release.tag_nameto ensure the exact release version is deployed - Deployment checks: Deploys to a preview URL first, waits for Vercel Checks to pass, then promotes to production
- Vercel CLI: Uses
vercel deploy --prebuiltfor faster deployments with pre-built artifacts
Step 3: Configure Required Secrets
The GitHub Actions workflow requires three secrets to authenticate with Vercel. Add these to your GitHub repository:
Settings > Secrets and variables > Actions > New repository secret
| Secret | Description | How to Obtain |
|---|---|---|
VERCEL_TOKEN | API token for Vercel CLI authentication | Vercel Dashboard > Settings > Tokens - Create a new token with appropriate scope |
VERCEL_ORG_ID | Your Vercel team/organization ID | Run vercel link in your project, then check .vercel/project.json for orgId |
VERCEL_PROJECT_ID | Your Vercel project ID | Run vercel link in your project, then check .vercel/project.json for projectId |
After running vercel link, your .vercel/project.json will contain both IDs:
Copy these values to your GitHub repository secrets. Do not commit this file to your repository if it contains sensitive project identifiers.
Step 4: Optional Staging Domain Configuration
For easier access to your staging environment, you can configure a custom domain that always points to your main branch deployments.
- Go to Project Settings > Domains in the Vercel Dashboard
- Click Add Domain
- Enter your staging domain (e.g.,
staging.yourdomain.com) - Under Git Branch, select
main - Save your changes
Vercel will automatically:
- Route traffic for the staging domain to the latest
mainbranch deployment - Provision an SSL certificate for the domain
- Update the deployment whenever
mainis updated
Example domain configuration:
| Domain | Branch | Purpose |
|---|---|---|
staging.yourdomain.com | main | Staging environment for testing |
yourdomain.com | Production | Production (deployed via GitHub releases) |
Creating a Production Release
With this configuration, the production deployment flow is:
- Merge PRs to main: Changes go to staging automatically
- Test on staging: Verify changes at
staging.yourdomain.comormain-<project>.vercel.app - Create a GitHub release: Use the changesets workflow or manually create a release
- Automatic production deployment: The GitHub Action builds, verifies, and promotes to production